When using the WordPress block editor screen, there are a lot of sections, sidebars, panels and options or settings available when writing posts or creating page content… Here are our top tips to work more efficiently in the WordPress editor… To help you speed up your process of adding content and getting the job done quicker.
Our 8 top tips to work more efficiently in the WordPress editor
Whether editing a site or building a new website, these are our main tips for building efficiently.
1) Quickly insert blocks using / (forward slash)
It can be a little tedious moving the cursor to the little ‘Add Block’ plus icon, or opening the block list and searching for the block each time you want to add a new block.
Instead… When you press “Enter” to start a new paragraph or block, simply type a forward slash (“/”) and you should then see a list of block suggestions appear, and you can type the name of the block you want to make the list of blocks narrow down to match your query.
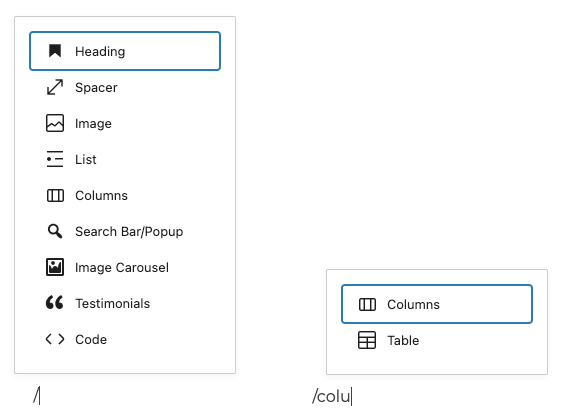
You can type the full name or use the arrow keys to select the block and then press “Enter” to add the block.
2) Select blocks quickly using the List View
Sometimes finding the block you want to edit is not as quick as you plan, especially if it’s the parent block of multiple nested blocks within the WordPress editor… Such as the right-hand side column block which is nested within a columns block.
The easiest and fastest way to select the block you want to edit is by opening the list view of the editor and selecting the block there.
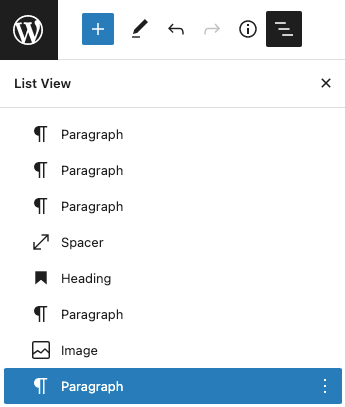
This will display a list of all blocks and the blocks nested within (parent) blocks.
3) Learn keyboard shortcuts
Learning the keyboard shortcuts are always a good thing, and definitely one of the best ways to speed up your use of the WordPress block editor, or actually for any software program. Even if it’s just a few main shortcuts that you learn.
Below are some of the most common, useful shortcuts:
On Mac:
- Navigate between blocks using the arrow keys – Up Arrow or Down Arrow
- Add a new block – Enter
- Change the block type after adding a new paragraph – /
- Save changes – Command + S
- Open the List View sidebar – Command + Option + O
- Undo your last changes – Command + Z
- Redo the last changes – Command + Shift + Z
- Duplicate the currently selected block(s) – Command + Shift + D
- Delete the currently selected block(s) – Control + Option + Z
- Insert a new block before the selected block(s) – Command + Option + T
- Insert a new block after the selected block(s) – Command + Option + Y
- Show or hide the main settings sidebar – Command + Shift + ,
- Show all keyboard shortcuts – Control + Option + h
On PC
- Navigate between blocks using the arrow keys – Up Arrow or Down Arrow
- Add a new block – Enter
- Change the block type after adding a new paragraph – /
- Save changes – Ctrl + S
- Open the List View sidebar – Ctrl + Shift + O
- Undo your last changes – Ctrl + Z
- Redo the last changes – Ctrl + Shift + Z
- Duplicate the currently selected block(s) – Ctrl + Shift + D
- Delete the currently selected block(s) – Shift + Alt + Z
- Insert a new block before the selected block(s) – Ctrl + Alt + T
- Insert a new block after the selected block(s) – Ctrl + Alt + Y
- Show or hide the main settings sidebar – Ctrl + Shift + ,
- Show all keyboard shortcuts – Alt + Shift + h
The WordPress editor also offers the default text formatting shortcuts that are the same for most programs such as making text bold, italic etc… If you’re not sure what these are then press Control + Option + h (Alt + Shift + h on PC) and view all the shortcuts available there.
4) Turn on ‘Show most used blocks’
You can also further customize how you interact with blocks in the WordPress block library and in the editing canvas.
You can turn on ‘Show most used blocks’ by clicking on the ellipsis (3 dots icon) in the very top right corner and select Preferences in the drop down menu.
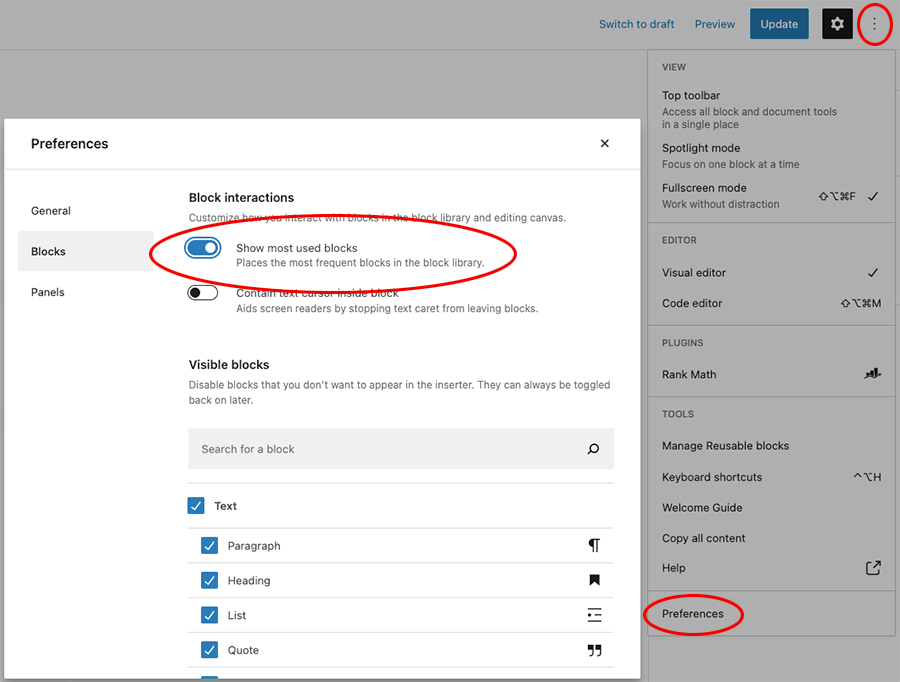
This will place the most frequently used blocks in the block library, as you use them.
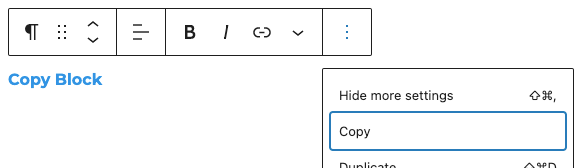
5) Copy a block and all its settings
Quite often you want to create a few of the same looking blocks on the page.
There are 3 ways to copy a block and all it’s settings.
1) Press Command + C (or Ctrl + C on PC) to copy the block.
2) Click on the ellipsis (3 dots icon) on the blocks toolbar and then select “Copy”
With the above 2 options of copying the block, you can then place your cursor anywhere on the page where you want the new block to get added and then simply type Command + V (or Ctrl + V on PC) to paste the block in position.
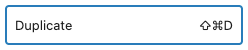
3) The third option is to click on the ellipsis (3 dots icon) on the blocks toolbar and then select “Duplicate”… This will create a direct copy of the selected block and place it right below as a new block.
6) Pin the Formatting Toolbar to the top of the editor screen
Instead of having the block Tool Bar display on top of each block when selected, you are also able to have it placed in a standard position for all blocks, this new position is pinned just below the main top tool bar.
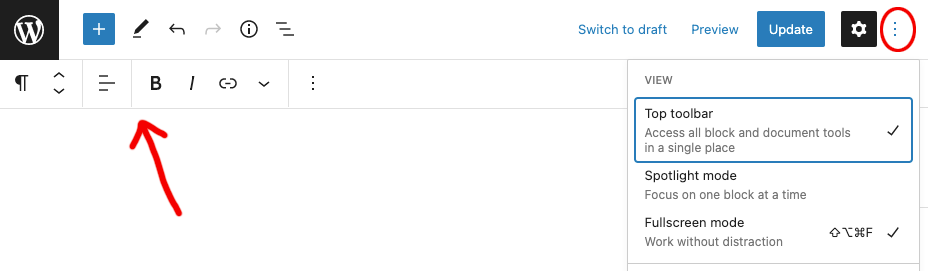
Simply select the ellipsis (3 dots icon) in the top right corner and select “Top Toolbar” to place it permanently at the top of the editing screen.
7) Hide the Blocks you’re not using
The WordPress block editor adds a lot of blocks by default, and certain plugins also add blocks that they think you might want to use.
If there are blocks you know you won’t be using or you simply don’t want them to show up when you’re using the editor, there is also an option to hide/remove them from the WordPress block editor.
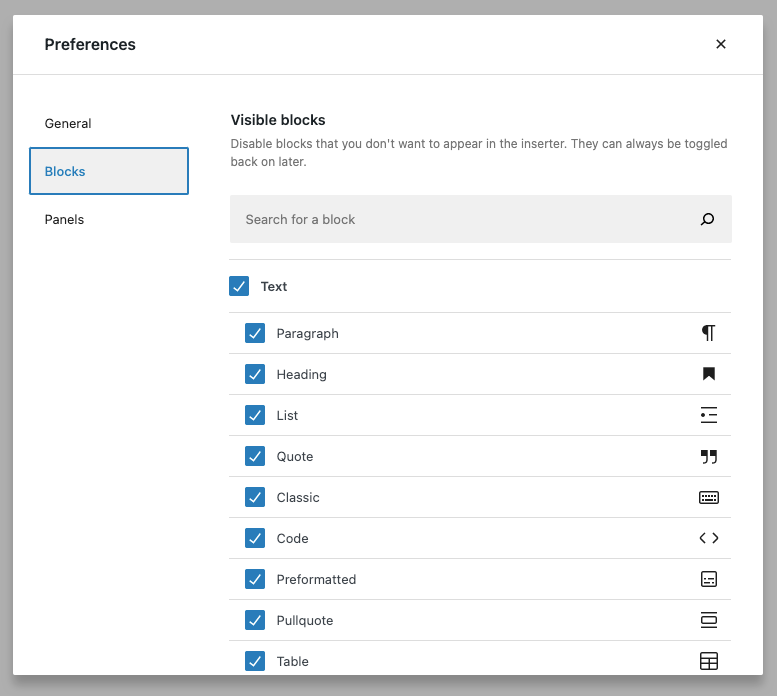
Select the ellipsis (3 dots icon) in the top right corner and select “Preferences“.
Then you can select “Blocks” on the left of the popup and there you can select which blocks to disable or leave visible to the editors block inserter.
8) Hide the Panels you’re not using
This is not as common, but you might want to remove some panels that have been added by a plugin or any other panels you find yourself not using.
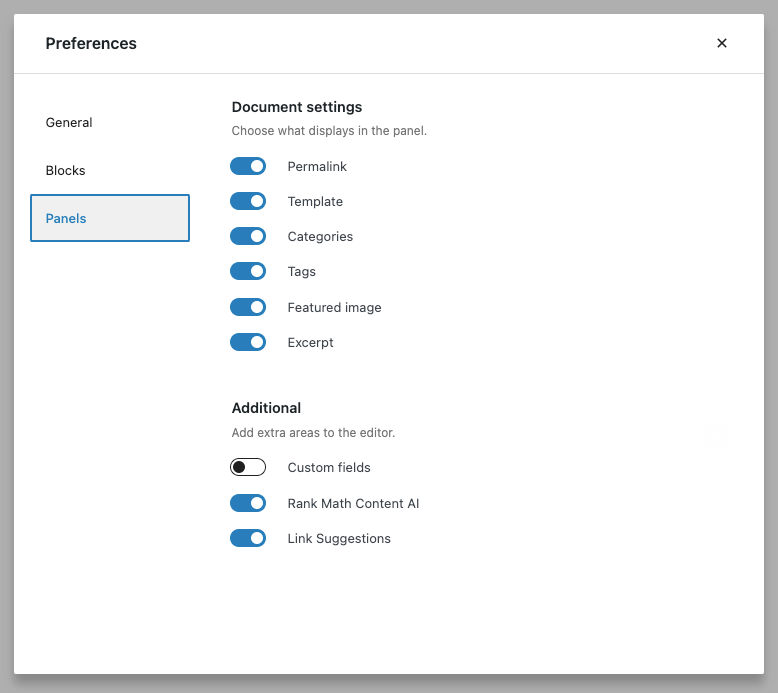
Select the ellipsis (3 dots icon) in the top right corner and select “Preferences“.
Then you can select “Panels” on the left of the popup and there you can select which panels to display or remove from the documents settings sidebar.
Hope you enjoyed our top tips to work more efficiently in the WordPress editor.
Happy editing !