While using the WordPress block editor, there’s a very high chance you’ll sometimes need to ‘go back’ a few steps while adding new content or editing your website content, as maybe you can’t remember what exactly it is you removed or changed in certain blocks or sections.
Here we’ll explain a bit on how to undo changes in WordPress by viewing the revisions and autosaves and using the Undo button.
While revisions and autosaves are very useful, we also recommend making regular backups of your website.
WordPress Revisions and Autosaves
Only Administrator and Editor roles in WordPress are able to view ALL the post or page revisions. Authors can see post revisions for the posts that they have authored, and contributors can only see post revisions on their drafts that they have created.
There are 2 ways that WordPress “saves” the content as you edit or add new content:
Revisions – Every time you click Save Draft, Publish or Update in the top right corner of the editor, WordPress saves a snapshot of the page content.
Autosaves – By default, as you edit the page content or blocks, WordPress will automatically save a snapshot every 10 seconds in the new WordPress editor (every 60 seconds in the old classic editor). It saves only one autosave at a time, so it replaces the previous autosave at each interval.
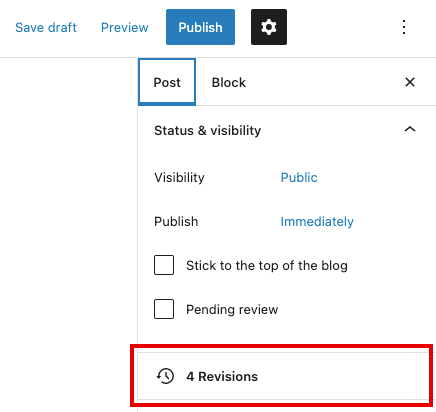
Revisions and Autosaves can be accessed at any time by clicking on the Revisions panel in the right sidebar

How to undo changes in WordPress by accessing revisions and autosaves
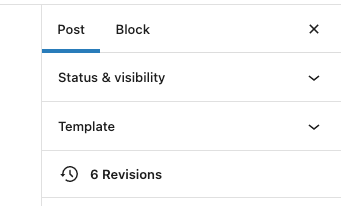
To access all revisions and autosaves that WordPress records as you edit your content, make sure you are on the “Post” panel in the right-hand sidebar of the editor, and click on the “Revisions” panel to see all changes that have been made.

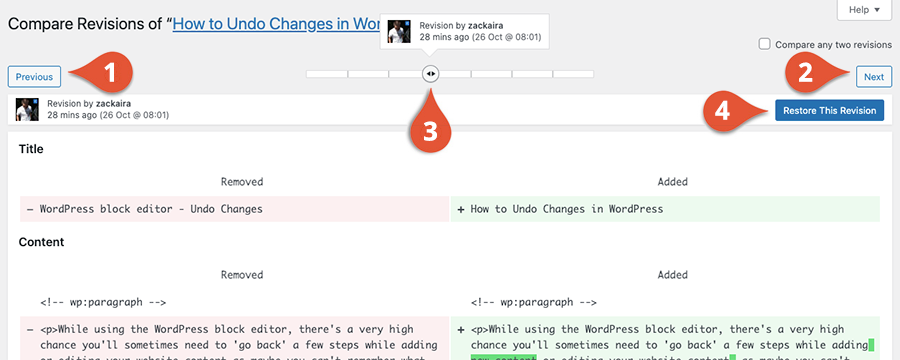
Once you click the revisions button, the screen will change to the Compare Revisions screen which can look a bit more confusing, but have a look at the image below and we’ll explain a bit about what you see and how to undo changes in WordPress posts and pages content.

1 – View Previous Revision – Jump back to a previous revision by clicking the “Previous” button.
2 – View Next Revision – Go to the next available revision by clicking the “Next” button.
3 – Revision Slider – Quickly skip back and forth through the post revisions by dragging the slider left (previous) or right (next) through the revisions until you find the one you’re looking for.
4 – Restore Revision – Once you find the revision you want to revert back to, click “Restore This Revision” to switch back to the chosen step and then carry on editing your content from there. WordPress doesn’t delete the other revisions, it simply creates a new revision with the content you’ve chosen to restore.
The main content shown in the Compare Revisions will show you exactly what has been changed… If content has been removed or written over then it will be displayed with a light red background and if new content was added then it will be displayed with a light green background and you can easily choose which content you want to carry on working with by using the revision controls explained above.
How to undo changes in WordPress by using the undo button
WordPress also offers a very simple way of quickly switching between revisions by having Undo & Redo buttons in the top left toolbar of the WordPress editing screen.

Simply click the Undo button to go back as many steps as you like, or Redo to go forward as many steps as you like.
